
How I Stack Images in Photoshop
One of my favorite places to take photographs of the Texas sunset is at Pedernales Falls State Park. Even when there isn’t much water flowing from the Pedernales River or aquifers, the natural spring just below the falls has a consistent flow that I love capturing. I frequent this park every season to practice my landscape photography techniques and enjoy the trails for an escape from urban life in Austin, Texas. The park is only an hour's drive from downtown and is captivating, with rolling hills full of live oak and ashe juniper trees across the landscape.
This first part of the summer was a particularly wet season, allowing the falls to rush the rest of the river with life. Just after one of our heavy rains, I made a solo trip to catch the sunset at the park to capture movement in the river and the sky. For this, I needed my filter kit from Nisi Optics and took several images to edit and stack in Photoshop. To capture the image I envisioned, I used my 100 x 150mm gradient neutral density (medium 3 stop) filter. The gradient filter allowed me to evenly distribute light throughout each image without worrying about overexposure.
I explained the importance of capturing multiple images of different layers within a landscape when the subject consists of various distances in my blog about capturing movement in landscape photography using long exposure techniques; however, I did not go into detail about my editing and stacking process.
My setup consisted of my DSLR Canon EOS 90D, Canon EF-S 10-22mm lens, and Nisi 1oo x 100 mm ND filter (10 stop). For vast landscapes that detail the foreground while enhancing the background, I recommend an ultra-wide, wide angle, or standard zoom lens.
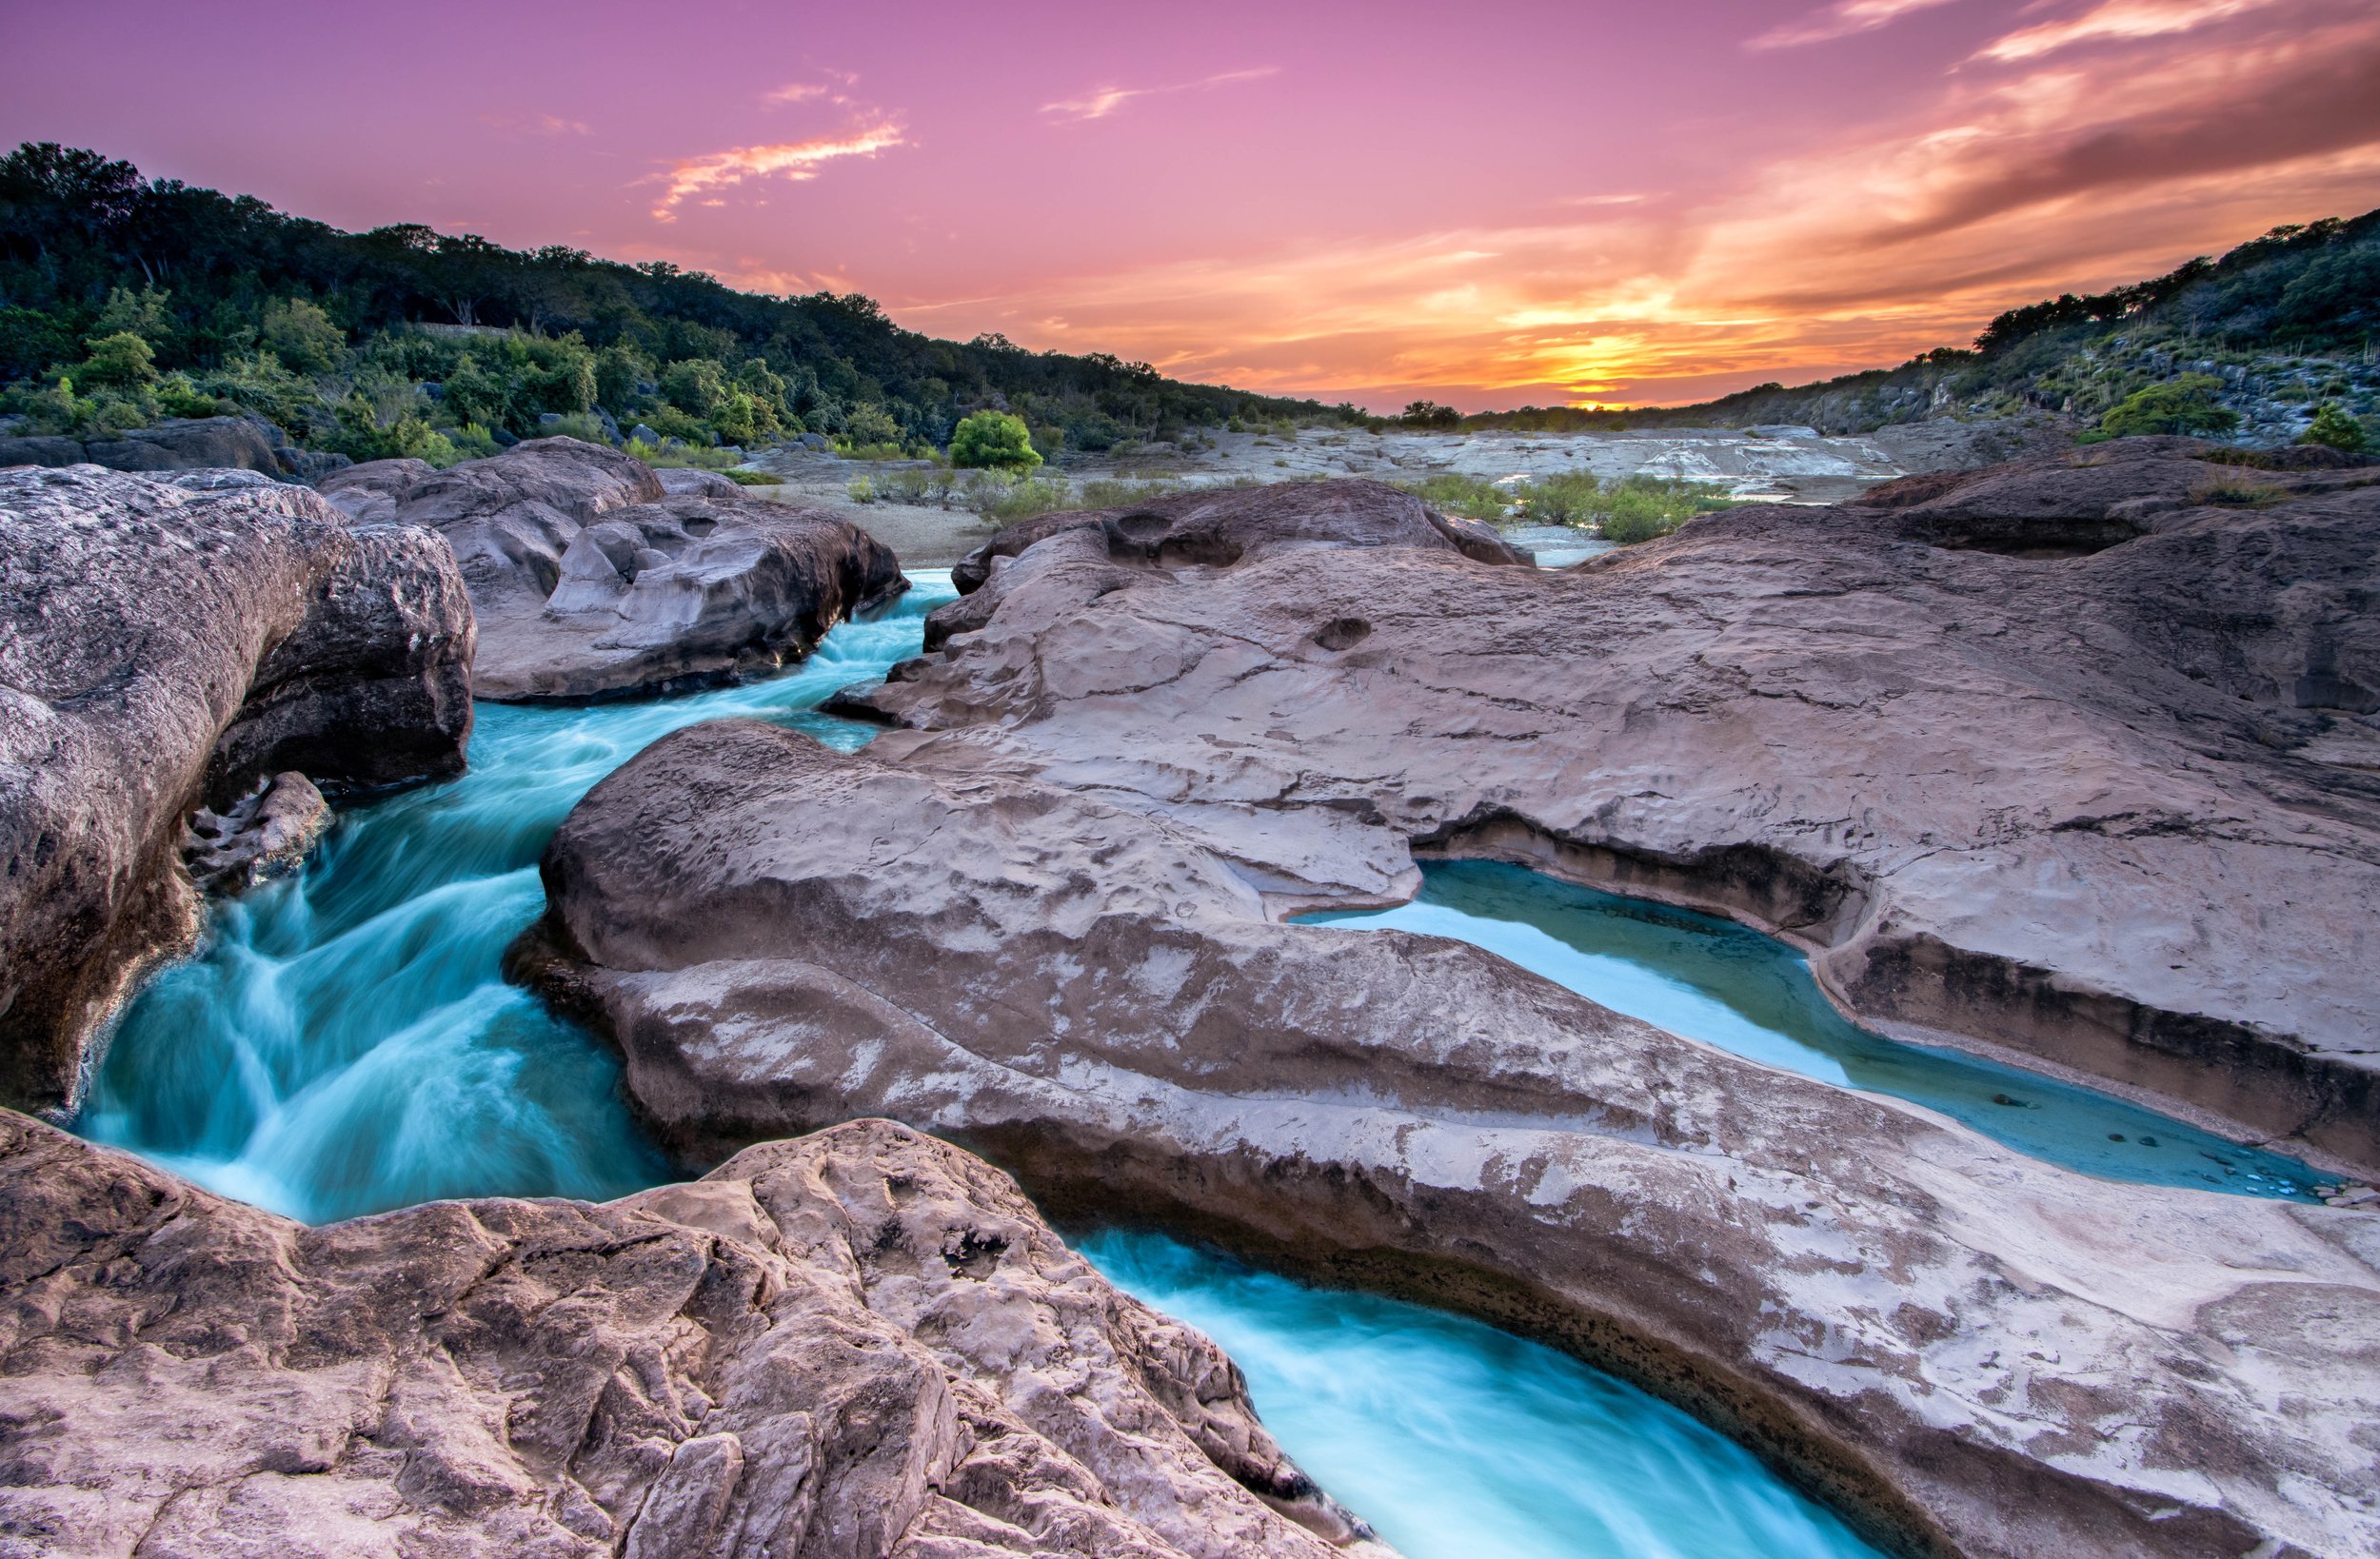
The final photograph
This final photograph consists of four different focused images individually edited and stacked in Adobe Photoshop.
One image without editing
Without the application of editing and stacking, I’m left with an overexposed sky and a lifeless landscape. I wanted to bring out the vibrancy in what I experienced while watching the sky beam with pink and orange hues that bounced off the Cow Creek limestone. Additionally, the spirit of the continued river deserved a higher saturation than I normally give water in my previous landscapes.
Step One: Focus on the Foreground
The closest element of my subject was the formation where my tripod and I stood. Beautiful textures were detailed within its rigid features that I could not discount it as my first layer. Once I dropped this image in Lightroom Classic, I made specific edits as the light dispersed throughout the landscape. My aperture consisted of f/9.0 throughout each layer to prevent distortion around the edges of each image. Despite Nisi’s high-quality filters preventing light leaks and vignetting, it’s important to have every setting and piece of equipment working together to create a seamless photograph.
Settings: at 10mm
Aperture: f/9
ISO: 100
Shutter Speed: .3 sec

Step Two: Focus on the Midrange (Two Separate Images)
Sometimes I can get away with only focusing on two or three layers for a stacked image, but in this case, I wanted to play it safe and take four images. This first midrange image focused on the river and surrounding Cow Creek limestone. While in Lightroom Classic, I created two separate masks: one focusing on the Cow Creek limestone and the other focusing on the river.
Settings: at 10 mm
Aperture: f/9
ISO: 100
Shutter Speed: .5 sec

Since the sun was setting directly behind the trees, hard shadows were cast on my vantage point. I wanted to brighten them by raising those shadows and showcasing those details. Additionally, I enhanced the saturation in the sand and neighboring brush. This was a small space to work in and took up most of my time editing, but it was well worth it.
Settings: at 10mm
Aperture: f/9
ISO: 100
Shutter Speed: .8 sec

Step Three: Focus on the Background
Finally, just before the sun disappeared beneath the horizon it was time to capture my final layer. Deciding when to capture the sky is completely preferential; sometimes exposure is ideal with the sun below the horizon while other times above is favored. Initially, I wanted to wait for the sun to settle under the horizon; however, the clouds settled near the ball of fire, giving me more opportunities to take my final image before it vanished. The air was still, allowing me to extend my exposure time longer than the other images.
Settings: at 10mm
Aperture: f/9
ISO: 100
Shutter Speed: 20 sec

Stacking all four images

Once I finished editing in Lightroom Classic, I selected all four images and opened them in Photoshop as individual layers.

Once in Photoshop, I ensured each layer was stacked in chronological order with the background layer on the bottom and the foreground layer on the top. Then, I selected all four layers and applied Auto-Align Layers. As the edit suggests, this feature will align all your images to ensure each photo is aligned perfectly. While I never adjusted my focal length and my camera was stabilized on my SIRUI tripod, I applied this command to eliminate any imperfections.

Finally, selecting each layer again, I applied the Auto-Blend Layers command. If all goes perfectly, Photoshop will enhance the best-focused layers and blend them. Since I applied different edits per layer (and sometimes Photoshop just doesn’t get it right), I used the eraser tool one layer at a time until I saw the image I wanted.
Before + After

What a difference! If this process seems meticulous, you’re not wrong, but I’d be lying if I said I didn’t have fun doing it! The final image shines as it reflects the vibrancy of a true Texas sunset. Additionally, I find myself reading a compelling story. One that illustrates the beauty in the obstacles we face on our journey toward the horizon. The movement in the water can wash all our efforts away, while the Cow Creek limestone is rigid with unforgiving textures. As we walk through every hardship, our destination never seems to get closer. Life is a dangerous path, full of rewarding lessons, each step a vibrant adventure worth traversing.
If you’d like to own the final photograph, click or tap here to go to my print shop.
Every purchase allows me to continue to do what I love as an exploring artist. Thank you!